This is my current favourite loaf, bar none. It’s easy to make – though the ‘quick’ part of the title definitely needs to be taken in context – but the end result is bread that’s full of flavour and texture and, most importantly, those air-pockets that fill up so delightfully with butter, jam, soup, or whatever else you put the slice on or in. It’s also so appealing to look at, beautifully rustic and craggy. And the smell! Well, that’s a given.

The recipe comes from the New York Times, and shortens the usual no-knead time from 12 hours to just 4. I’ve even cut the initial rising time back to three hours, on a warm day, and it’s still come out really well. Did I mention I love this recipe?
I have begun to diverge from the recipe a little over time, even though you’d think there wasn’t much room to stray from the simple path it lays out. I keep the ingredients as directed, and while I sometimes monkey with the initial rise time, I generally leave it for four hours – it takes so little time to mix those ingredients together that you can get it started quickly, then go about the next four hours of your day without giving it another thought.
Tip One: Be absolutely positive to mix the dry ingredients well before adding the water. Otherwise your yeast will clump together and you’ll have a devil of a time trying to mix it through the flour.
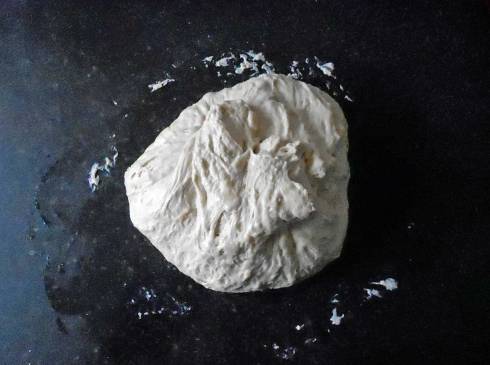
The dough will be shaggy, as the recipe states. For me, that means it looks like this:

It’s not a ball of dough, there are no smooth surfaces to be seen. It’s kind of lumpen and unlovely, if we’re honest. That doesn’t matter. Wrap it up tight, keep it cosy, and let the yeast do its work. It’s pretty much lumpen and unlovely all the way, until you take it out the oven at the end and marvel over its beauty. Kind of an ugly duckling situation…er… if that story ended with roast swan for dinner…
Tip two: That was a joke. Do not eat swans.
After it rises, it will be a little more swampy than before, and when you tip it out onto your well-oiled worktop, you’ll see tons of bubbles, like so:

This is good news. Try not to bash all the air out of the dough, since you’ve made the yeast work double time to create it in the first place. The dough now gets folded over a couple of times, to give it height. I usually go for a four-way fold – imagining the dough as a square, I lift and fold a section from the top and bottom, then from the left and right. I end up with a kind of swag-bag shape. The dough is sticky and joins up easily, to itself and also to your hands.
Tip Three: Coat your hands in oil or water to stop the dough from clinging to them. Make sure your surfaces are well oiled, too.
The bread relaxes for another half hour after you’ve folded it. It is a soft dough, and it won’t hold its shape over this time. You can stick an inverted bowl over the top – making sure to oil any of the bowl that will come into contact with the dough – to prevent it from spreading too much.
Put the oven on to heat in this half hour – it’s going up to 230C, so it needs some time to get there. Also put the baking dish or tin you’ll be using in there, so it’s piping hot before you put the dough in. This is an area where I differ from the recipe – I use a cake tin to bake the bread, instead of a proper dish with a lid. I leave it uncovered, and bake it for less time. It’s not the recommended method, but it works for me.
The moment when you move the risen dough into the baking tin is the worst part of the whole operation. It’s so soft and delicate that you feel sure you’re going to ruin it – or that you’ll never be able to get it off the counter and into the tin. Have courage – you can do it.


I sprinkle the surface with a little flour, which helps to stop more sticking and lets me shape the dough just a little, enough to make sure it’s the same size as the awaiting tin. I gently pat and turn it with my hands – the turning makes sure that it’s free of the counter. If it sticks, I get in there with a dough scraper and loosen it off. It’s only a matter of time before the moisture in the dough either soaks into the flour on the surface, or re-attaches to the counter, so you do have to move fast. Scoop it up and drop it into the tin, and give the tin a shoogle to even it out in there.
Tip Four: That baking tin is HOT so be careful. Drop the dough from a little way above the tin, so you don’t hit it with the back of your hands and end up with matching burn marks. People will not be sympathetic about those. They may even snigger.
I bake, uncovered as it is, for half an hour. With my oven, this is when the crust is golden and the loaf sounds hollow when I tap on the base.

Tap tap tap…

Put the loaf on a rack as soon as you can, to let any extra moisture out, and let it cool a little before slicing into it. It will be difficult to resist. Be strong.

And there it is. It’s not my recipe, but it’s one I think a lot of people need to know about. Or no-knead to know about. Ahahaha…
Postscript: I just ate the slice of bread in that picture up there, and it was just so good. The bread is moist and chewy (the way I like it), and has a hint of sourdough flavour from the longer rise. Just a hint. A splash of sourdough starter might be the next way I change the recipe. I don’t know, though. It’s pretty darn perfect.
Share it like a Polaroid picture:


